Last updated November 18, 2026





Free written scope consultation - allowances, timeline, and change-order rules on paper before a single trade is scheduled
Driveway & Pavers Troubleshooting: Common Problems and How to Fix Them
If you’re seeing one sunken paver, there are probably six more about to follow. That’s not pessimism, it’s pattern recognition. Individual pavers don’t fail randomly – they fail in clusters that map directly to what’s happening underneath them. A paver sitting a half-inch low near your garage apron is telling you something different from a wavy field in the middle of the driveway, and different again from a corner that’s dropped at the street. In this guide, we’ll walk you through how to read those failure patterns, tell joint sand erosion from base erosion before you spend a dime on the wrong repair, and know when a cracked paver is cosmetic versus structural. It’s written from what we’ve seen across Aventura driveways and the specific pressures South Florida puts on them.
Quick Answer
Most driveway paver problems are base or drainage failures showing up at the surface, not paver defects. A single sunken paver usually means water has been getting under the edge or through the joints for months, washing out the sand or the compacted base beneath it. Fixing the visible paver without correcting the base and drainage underneath is a temporary patch – you’ll be back at the same spot within 18 months.
Styles & brands we work with
- Kitchen remodeling
- Bathroom remodeling
- Home additions & ADU
- Roofing
- Windows & doors
- Driveway & pavers
- Fence
Table of Contents
- How to Read Paver Failure Patterns
- Joint Sand Erosion vs. Base Erosion: How to Tell Them Apart
- A DIY Reset vs. a Base Rebuild: Where the Line Is
- Why Aventura’s Rainy Season Accelerates Sand Bed Washout
- When a Cracked Paver Is Cosmetic vs. Structural
- Drainage Problems That Cause Paver Movement
- Step-by-Step: A Proper Paver Repair from Start to Finish
- Preventive Maintenance for Aventura Driveways
How to Read Paver Failure Patterns
Before you grab a screwdriver and start prying up the loose paver, stop and look at the whole picture. Pavers fail in three distinct patterns, and each one points to a different root cause.
Edge Failures
When pavers along the driveway edge – against the grass, the curb, the garage apron, or a planter bed – start to sink, tilt, or separate, you’re almost always looking at a failed edge restraint. Concrete paver edge restraints are what hold the whole pavement surface in compression. When the restraint heaves, cracks, or was never installed deep enough, the edge pavers spread outward and the sand bedding beneath them migrates into the void. In Aventura, we see a lot of edge failures at the transition from driveway to swale, where the curb elevation meets the street. Once that restraint breaks, water enters the open joint and the problem travels inward.
Field Failures
Waviness, rutting, or a whole section of pavers settling together in the middle of the driveway is a base story. This pattern usually means the compacted aggregate base beneath the sand bedding wasn’t thick enough for the traffic load, or it wasn’t compacted in lifts, or the subgrade soil under it wasn’t stable to begin with. Field failure is also the tell for underground water: an irrigation line leak, a broken sprinkler head, or a downspout discharging under the pavement will carve a channel that shows up as a linear depression of pavers above it.
Isolated Spots
A single paver or a tight cluster of two or three that drops by itself, with the surrounding pavement flat and stable, is the best-case scenario. It’s usually one of four things: a paver that was never set on a properly screeded sand bed, a chipped or cracked paver that’s collecting water in its joint, a localized root intrusion from a nearby ficus or palm, or an old utility repair where the trench was backfilled and re-paved with inadequate compaction. Isolated spots are the ones you can often reset yourself.
One more thing to look for: direction of the movement. If pavers are pushing up and touching, that’s typically expansion from water-saturated base or a failed joint that let in debris. If pavers are dropping down and separating, that’s washout. Up means too much material, down means missing material. Those two situations take opposite repair approaches.
Joint Sand Erosion vs. Base Erosion: How to Tell Them Apart
This is the diagnosis that most homeowners get wrong, and it’s why the wrong repair gets sold to them – or why they do the wrong repair themselves. Joint sand and base material are both eroded by water, both create visible problems, and both need different fixes. Here’s how to tell which one you have.
Joint Sand Erosion
Joint sand is the polymeric or stabilized sand in the gaps between pavers. Its job is to lock the pavers together laterally and keep water from channeling directly into the bedding layer.
- Pavers are still firm underfoot and still sit at the same height as their neighbors.
- The joints look shallow, washed out, or hollowed at the surface – you can see down past the normal joint depth.
- Weed growth in the joints is common, since the sand barrier is gone and organic material can settle in.
- Occasional ants or small pests between pavers, because there’s a gap to nest in.
- No noticeable low spots when you put a straightedge or a level across the pavement.
Joint sand erosion is a maintenance issue. Re-sanding with a proper polymeric joint sand is a legitimate fix, and if the pavement is otherwise stable, it can be done without pulling any pavers. The catch – and this matters in Aventura – is that polymeric sand must be installed dry, and it must cure for 24 to 48 hours without rain. During our May-through-October wet season, that window has to be watched carefully or the sand will haze over and never fully set.
Base Erosion
Base erosion means the compacted aggregate or the sand bedding under the pavers has been displaced or washed away. The pavers are literally unsupported.
- Pavers rock when you step on them, or feel spongy.
- Visible low spots – 1/4 inch or more – when you lay a level or a straight 2×4 across the surface.
- Pavers that have separated from their neighbors, opening up wide joints.
- A hollow or “slapping” sound when you tap a paver with a screwdriver handle.
- A depression that shows up or gets worse right after a heavy rain.
Base erosion is not a re-sanding job. Re-sanding a washout just fills the joint with fresh material that will disappear again in the next storm. You have to pull the affected pavers, remove the bedding sand down to sound compacted base, correct the drainage path that caused the washout, rebuild the base in compacted lifts, and re-lay the pavers. In many Aventura driveways, the repair area is bigger than the visible low spot – we’re usually pulling a 4-foot by 8-foot section for what looks like a single soft spot.
A DIY Reset vs. a Base Rebuild: Where the Line Is
Some paver repairs are genuinely within reach of a confident homeowner with a wheelbarrow and a hand tamper. Others are not, and trying to DIY a base rebuild usually makes the next repair more expensive because the paver pattern gets chipped and the bed gets disturbed.
What You Can Realistically DIY
- A single isolated paver reset. Pry up the paver and the one directly adjacent to it, scrape out the old bedding sand, add fresh sand, screed it flat, and re-set both pavers so their tops match the neighbors’ with a dead-flat straightedge check.
- Joint sand replacement. If the pavement is stable and you’re only refilling the joints, a dry polymeric sand job done in a 48-hour dry window is a reasonable DIY project.
- Edge weed and debris removal. Clearing the edge zone and re-checking the restraint for visible cracks or heaved sections is straightforward maintenance.
- Washing and re-sanding before sealing. Cosmetic work, worth doing for appearance, but don’t expect it to fix a structural problem.
What Needs a Rebuild
- Any low spot bigger than 1/4 inch spanning more than two pavers. Once the failure is wider than a single paver and its neighbor, the base beneath is disturbed.
- Any rocking or spongy paving. There’s no fix for this without removing the pavers and rebuilding the bed.
- Failure at the driveway edge. Edge failures almost always require replacing the concrete restraint, not just patching the pavers above it.
- Wavy or rutted field sections. Whole sections need to come up – you can’t screed a base back to grade from above.
- Anything below the water table or in a low spot on the lot. Aventura lots tend to sit close to sea level and water doesn’t have far to fall, so drainage has to be corrected before the pavers go back down.
Here’s the honest threshold: if the fix involves more than pulling three pavers, the tools required (plate compactor, rubber mallet, screed rails, paver pullers) start to cost more than having it fixed, and the compaction you can achieve with a hand tamper is not what a machine delivers. A base that isn’t compacted to spec will fail again – usually within one wet season.
Why Aventura’s Rainy Season Accelerates Sand Bed Washout
If you moved to Aventura from a drier climate, the paver failures on your property might look strange compared to what you’re used to. The reason is the wet season, which runs roughly from May through October and drops the bulk of the region’s annual rainfall in that window. That’s not trivia – it shapes how driveways fail here.
The Water Column Under Your Driveway
Aventura’s water table sits close to the surface on most lots, and the flat topography means stormwater drains slowly and ponds in the swales and the lowest point of the lot. A driveway that sits within a foot or so of the seasonal high water table has a water column beneath it during the wet season. That water exerts upward pressure on the base material. When it recedes, it takes fine material with it, which is why a quiet, stable driveway in February can develop a half-inch waviness by September.
Sand Bed Washout Mechanics
Above the compacted aggregate base sits a 1-inch bedding layer of concrete sand. Under normal use, that sand is held in place by the pavers above, the joints filled with polymeric sand, and the edge restraint on the perimeter. Take away any one of those three and water does the rest. In Aventura, the specific sequence usually looks like this:
- A joint fails, either from age, from weed growth, or from a paver chipping.
- Rain lands on the joint and flows directly into the bedding sand rather than sheeting off the pavement.
- Repeated wetting consolidates and displaces the bedding sand, creating a slight depression.
- The depression holds more water on the next storm, and the cycle accelerates.
- The pavers above the washout begin to rock, which opens more joints, which lets in more water – and now you’re into the base.
This is why preventing joint failure is the single most important maintenance task on an Aventura paver driveway, and why re-sanding in April – before the rains start – is so much more effective than re-sanding in October.
Irrigation and Downspout Failures
Two more wet-season triggers show up over and over. First, irrigation systems in Aventura properties run before dawn even through the wet months, and a broken pop-up head or a cracked lateral line quietly soaks the base under the same corner of the driveway for weeks. Second, roof downspouts that discharge close to the pavement rather than into a properly graded swale will carve a washout channel into the bedding sand over a single season. If you have a mysterious low spot near a downspout or sprinkler head, that’s not a paver problem – it’s a water management problem.
When a Cracked Paver Is Cosmetic vs. Structural
A cracked paver doesn’t automatically mean bad news. What determines severity is what’s happening underneath it.
Cosmetic Cracks
- The crack runs through one paver only and doesn’t cross into neighbors.
- The paver sits flat and firm – no rocking, no height difference.
- The crack runs vertically, like a stress fracture, rather than along a joint line.
- You can trace the origin to a single impact – a delivery truck tire, a dropped tool, a heavy planter.
Cosmetic cracking is a replacement job, not a rebuild. A skilled installer can usually pull the cracked paver, salvage the pavers around it, and reset the replacement into the existing bed in a few hours. The tricky part is color matching; paver lots vary, and older Aventura driveways are often in color blends that are no longer in production. Many installers will pull a matching paver from a hidden spot – under a hose bib, behind a planter – and swap it into the visible area.
Structural Cracks
- Cracks that propagate across multiple pavers in a line or a pattern.
- Cracks combined with settling – the cracked pavers are lower than their neighbors.
- Cracks along a joint line or the edge of the driveway, not through the middle of a paver.
- Cracks that appear after a heavy rain or irrigation run, not one isolated failure event.
Structural cracking means the pavement is moving, and the crack is the visible evidence. The fix is base repair of the affected section and replacing the cracked pavers, not a cosmetic swap. A paver replaced into a moving base will crack again within the same season.
The Replacement Threshold
Here’s the practical rule we use: if the cracked pavers are more than about 20 percent of the total driveway area and show settling, the repair becomes a re-lay of the failed section, not a spot replacement. Below that, individual swaps make sense. Once you’re past 30 percent, base rebuild of the whole driveway is usually the more honest recommendation – because the sections you aren’t repairing are being held together by the same failing base, and you’ll be back for a second and third patch in the next few years.
Drainage Problems That Cause Paver Movement
Almost every driveway paver failure we get called to in Aventura traces back to water. Not paver quality, not the installer’s pattern, not traffic load. Water. Which means drainage is not a secondary consideration when you’re troubleshooting – it’s the primary one.
- Inadequate slope. A driveway should slope at a minimum of about 1 to 2 percent away from the garage and toward the street or a drainage point. Driveways with less slope, or with a slope that changes direction (a subtle crown, or a reverse pitch near the apron), collect water in the middle and soak the base.
- Failed edge restraint. The most common drainage failure we see. Once the edge restraint cracks or heaves, the perimeter becomes an open door for water into the bedding layer.
- No positive drainage path at the low point. If the driveway has a low spot that doesn’t drain to the street, water sits against the pavement until it infiltrates. Options include a channel drain, a trench drain at the apron, or regrading to restore the intended slope.
- Downspout discharge too close. Roof water that lands within 3 feet of the driveway edge and isn’t directed away will erode the joint sand and eventually the bedding sand.
- Irrigation system malfunctions. Overspray from a sprinkler head, a leaking valve, or a broken lateral line under the pavement is a silent washout source that shows up as a soft spot.
Drainage correction is often the smallest line item in a proper paver repair, and the one most often skipped. If a repair proposal doesn’t explain how water will be moved away from the repair area, ask what the drainage plan is. If there isn’t one, the repair is going to fail again.
Step-by-Step: A Proper Paver Repair from Start to Finish
This is the sequence a trained paver crew follows for a base repair. We include it so you can recognize a proper repair when you see one quoted, and so you understand what’s happening when a repair job runs longer than you expected.
- Diagnose the failure pattern and map the affected section. Edge, field, or isolated. Poke-test around the visible failure – usually the repair area extends 12 to 18 inches past the visible low spot in all directions.
- Photograph and lift the pavers. Lift the affected pavers plus one row beyond, keeping them stacked and labeled so they can be re-laid in the same pattern.
- Remove the bedding sand and the failed base. Scrape down to sound, compacted, undisturbed base. In most Aventura washout repairs, we’re removing 3 to 6 inches of material.
- Fix the drainage cause. Repair the broken irrigation line, reroute the downspout, replace the failed edge restraint, or add drainage – whatever caused the washout in the first place.
- Rebuild the base in compacted lifts. Base material goes back in 2-inch lifts, each one compacted with a plate compactor before the next lift goes down. Skipping lifts is the number one cause of a repeat failure.
- Set screed rails and screed the bedding sand. Bedding sand is 1 inch thick, screeded flat, not walked on before the pavers go back.
- Re-lay the pavers in the original pattern. Every paver seated flush with its neighbors, checked with a straightedge in both directions.
- Compact the finished section and re-sand the joints. One pass with the plate compactor, then polymeric joint sand swept into the joints, then a light mist and a 24 to 48-hour dry cure.
For a repair of a section up to around 8 feet by 10 feet, most jobs comfortably in a single visit, weather permitting. Polymeric joint sand curing is the wildcard in Aventura – if the forecast has rain in the next 48 hours, the right move is to schedule around the weather rather than risk a failed cure. That’s a planning consideration, not a speed one, and any paver contractor who ignores it is going to leave you with joint sand that hazes or washes out on the first storm.
Preventive Maintenance for Aventura Driveways
The best time to spend money on your paver driveway is before a failure shows up. Here’s what actually moves the needle in our climate.
Twice a Year
- Walk the perimeter and inspect every edge. Any paver at the edge that rocks, or any crack or gap in the edge restraint, is a future failure and needs attention before the wet season.
- Check joint sand depth in 5 or 6 random spots. If the sand is more than 1/4 inch below the chamfer on most pavers, you’re due for re-sanding.
- Look at your downspouts and irrigation heads after heavy rain. Any standing water on the driveway, or visible runoff crossing the pavement, is a drainage issue to fix now.
Annually
- Re-sand joints before the wet season, not after. In Aventura, that means April or early May. A properly applied polymeric sand locks the joints and dramatically slows bedding sand washout.
- Have irrigation inspected by an irrigation professional. A single hidden line break can quietly soak a whole corner of the driveway for months.
- Pull a straightedge across the driveway in 3 or 4 directions. A 6-foot straightedge laid on the pavement will show you low spots long before you feel them underfoot.
Common Mistakes to Avoid
- Re-sanding a washout instead of repairing the base. Fresh sand in a joint over a hollow bedding layer disappears in the first rainy season. It’s the single most common wasted-trip repair we get called back to correct.
- Patching one paver when the pattern is broader. If a low spot is wider than two pavers, the surrounding base is disturbed. A one-paver patch will look good for a month and fail again in the next Aventura thunderstorm.
- Ignoring the edge restraint. Most Aventura edge failures we see are from a restraint that was cracked or heaved for months – or years – before the pavers started moving. Fixing the pavers without fixing the restraint is a guaranteed repeat.
- Skipping base compaction in lifts. A base dumped and compacted in one thick pass will not reach the density a properly built base reaches. This shows up as field settling in one to two years.
- Applying polymeric joint sand without a dry 24 to 48-hour cure window. During Aventura’s wet season, this is a scheduling commitment, not a detail. Rain during the cure window leaves you with hazed joints and sand that never fully locks.
- Power-washing aggressively into joint sand. A pressure washer at the wrong angle strips the polymeric sand out of the joints in minutes. Low pressure and a 25-degree or wider tip is the safe way to wash pavers.
- Choosing paver color before checking color continuity. When replacing individual pavers, color lots vary. Pull a paver from a hidden area to match, or order spare pavers with the original install – too many Aventura driveways have visible color mismatches from spot repairs with pavers mixed from a different lot.
See the difference
 Before
 After
 Before
 After
 Before
 After
When to Call a Professional
Some paver failures are safe to fix yourself. Others need a trained crew with the right equipment, and calling a pro is the cheaper decision when you tally up the cost of a repeat repair. Call a professional when the failure is wider than a single paver, when pavers rock or feel spongy underfoot, when the edge restraint has failed, when you see recurring low spots after rain, or when a repair would involve more than three or four pavers. Compaction to spec takes a plate compactor, not a hand tamper, and screeding a base flat takes rails and practice. If you’re not sure which category you’re in, an on-site evaluation is worth paying for – because the wrong repair costs more than no repair.
Groundwork Construction Co. of Aventura installs and repairs Driveway & Pavers in Aventura, and we offer free estimates throughout the area – call (833) 716-6251 to schedule one. Bring us photos of the failure and a rough measurement of the affected section, and we can often tell you over the phone whether you’re looking at a spot repair or a section rebuild before we ever show up. Every repair we do is backed by our 730-Day Done Right Promise – if it’s not done right, we make it right. Calls are answered by a live person, 24 hours a day, seven days a week.
Frequently Asked Questions
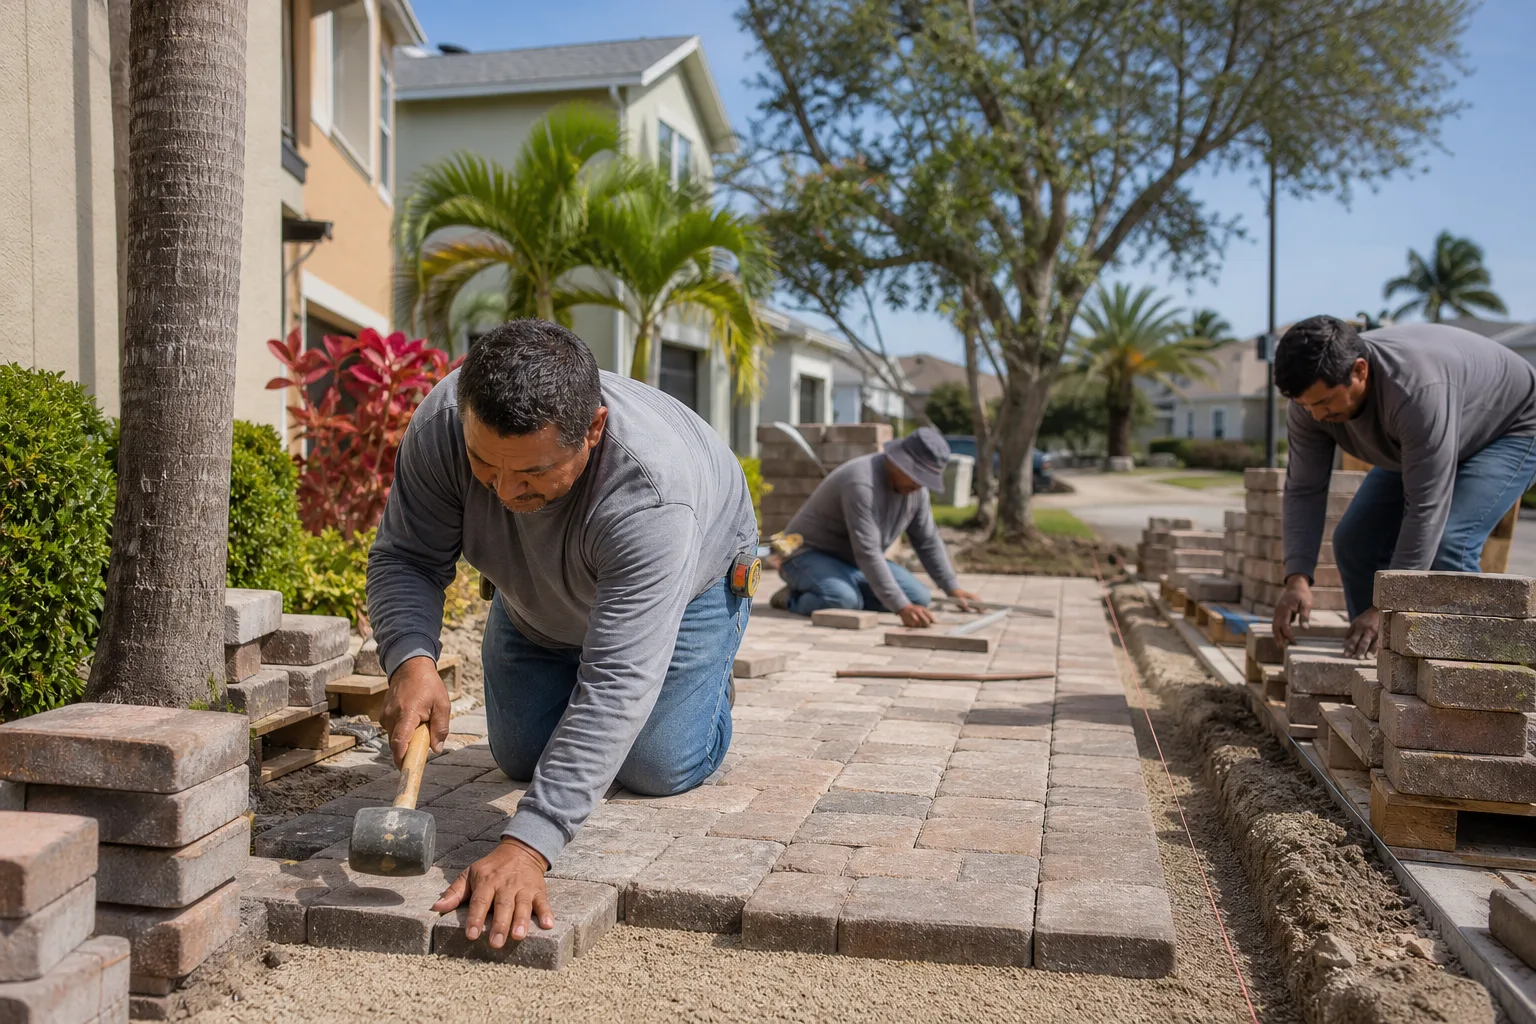
One sinking paver almost always means the bedding sand beneath it has washed out – either from a failed joint above it letting rain in, a broken edge restraint nearby, or an isolated irrigation or downspout leak that’s quietly soaking that spot. If the pavers around it are firm and level, it’s usually a single-paver reset. If you see a hint of waviness in the surrounding pavers, it’s the beginning of a broader base failure and worth having looked at. In either case, the fix starts by identifying why that paver lost its support, not just resetting the paver.
Put a 6-foot straightedge or level across the pavement. If it sits flat and the pavers feel firm underfoot, you have joint sand erosion – a maintenance fix. If the straightedge rocks, or if any paver feels spongy or moves when you step on it, you have base erosion – a rebuild of the affected section. Joint sand erosion shows up at the surface only; base erosion shows up as a change in elevation or movement. The two have very different price tags, so it’s worth confirming before you schedule a repair.
Paver repair in Aventura typically runs from about $300 to $900 for a small isolated reset, $1,200 to $3,000 for a section base rebuild of up to around 100 square feet, and $4,000 and up for larger repairs that involve edge restraint replacement or drainage correction. The variables that move the price most are how deep the base has to be excavated, whether the edge restraint needs replacement, and whether a drainage correction is part of the repair. Repairs that skip the drainage line item are cheaper on the front end and more expensive a year later – so ask any contractor how the water is being managed in the repair area before comparing quotes. Call (833) 716-6251 for an exact quote specific to your driveway – estimates are free.
It shouldn’t. With upfront pricing, the number on the estimate is the number you pay, and any change would be a scope change you approve in writing first. The one legitimate reason a paver repair cost can change after work begins is if the crew discovers the underlying cause is larger than what the estimate covered – for example, pulling up pavers and finding the base failure extends two feet further than the visible low spot suggested. That conversation should happen before any additional work, with photos and a documented square footage. If a contractor gives you a verbal number and then a different invoice, that’s not upfront pricing.
A single-paver reset is a few hours. A section base repair up to around 100 square feet is normally a single day, weather permitting. If the repair involves polymeric joint sand re-application, the cure window adds 24 to 48 hours during which the pavement shouldn’t get wet – and in Aventura, that means checking the forecast before the job is scheduled. Larger repairs, edge restraint replacement along a full driveway, or drainage corrections (channel drains, regrading) can run two to three days. If you’re planning a repair, the right question is not how fast the crew can work, it’s when the safe weather window opens. Call (833) 716-6251 and we’ll talk through timing in your part of Aventura.
You can reset one isolated paver yourself if the pavers around it are firm and level and you have a dead-flat straightedge to check your work. You can also re-sand joints yourself if the pavement is stable and you can commit to a 24 to 48-hour dry cure window. Anything wider than a single paver reset, or any repair that requires rebuilding base material or replacing edge restraint, is better handled by a crew with a plate compactor and a proper screed setup. The most common outcome of a DIY base repair is a repeat failure within one wet season, which is more expensive than the original repair would have been. Call (833) 716-6251 if you want a free estimate to compare against your own plan.
The Bottom Line
On almost every driveway we look at in Aventura, the visible paver failure is a symptom, not the cause. Reading the failure pattern – edge, field, or isolated – tells you where the water is coming in and which layer of the assembly has failed. Joint sand erosion and base erosion are different repairs, and treating one as the other is the most common way to waste money on pavers. South Florida’s rainy season accelerates everything, so maintenance and repair timing matter: re-sand before May, confirm a dry cure window, and fix drainage problems before you touch the pavers above them. Get those three things right and your driveway will hold for years. Get them wrong and the same low spot will be back, larger, within one wet season.
If you’re ready to stop guessing and want a straight answer on what’s actually wrong with your driveway, call Groundwork Construction Co. of Aventura at (833) 716-6251 for a free estimate. We’ll walk the pavement with you, show you exactly which failure pattern you have, and quote the repair that fixes the root cause – with upfront pricing, no surprises, and our 730-Day Done Right Promise standing behind it. You can also explore the rest of Groundwork Construction Co. of Aventura home services, our Fence Installation in Aventura work, or our Home Additions & ADU in Aventura projects – and remember, calls are answered by a live person 24 hours a day, seven days a week.
Written by the team at Groundwork Construction Co. of Aventura.